4 Edit Menu
4.3 Duplicate
This command allows you to create one or more copies of the object or group of objects you have selected. The offset values are applied incrementally which means that if you specify two copies with an offset of 2m, the first copy will be created 2m away from the original and the second copy will be created 4m away from the original etc. Note that the rotation angle takes the placement of the rotation anchor into account.
 For instance you can create a circle of ten boxes by selecting a box, moving the rotation anchor of the circle, choosing the Duplicate command, entering an angle of 36 degrees (a full circle of 360 degrees split in ten objects) and 9 copies (since one box already exists, the result will be 10 boxes).
4.4 Replace
To replace fixtures in your design, first select the fixtures you wish to replace, then activate the replace mode using this command, locate the fixture type you wish to use instead in the Library tab and finally drag it onto one of the selected fixtures.
This way all the selected fixtures are replaced for the new fixture type chosen. You can also drop the new fixture type onto any other fixture or replaceable object not selected, but this way you can only replace on fixture or object at a time.
4.5 Split
When a single point of a cable is selected, this commands adds an extra point next to it.
4.8 Break Out of Group
This command breaks the currently selected object(s) out of the group(s) they are part of.
4.9 Break Group
This command breaks the currently selected group(s) without deleting their contents.
4.10 Transform
This command allows you to move or rotate by an exact distance or amount of degrees. Use the green navigator cube to guide you with the X, Y and Z directions in the current view. Note that the rotation angle takes the placement of the rotation anchor into account and always performs a Group rotation.
4.11 Align
This command allows you to select a group of objects and quickly align them a long a specific axis very quickly. Whatever align function is used is always relevant to the design view you are using it in. The options available are displayed to the right.
4.12 Spread Even
This command allows you to select a group of objects or fixtures and spread them evenly along a vertical or horizontal axis very quickly. It is extremely useful for making lines of objects very quickly.
4.13 Mirror
This command rearranges the selected objects in a mirror-like fashion. The mirroring direction is relative the currently focused design view. By default it mirrors around the centre point of the selected objects, but you can enter any coordinate desired.
By checking the Duplicate checkbox the selected objects are duplicated and the new objects are mirrored and finally left selected.
4.14 Clear Plot Adjustments
This command clears any Plot Adjustments made for the selected objects. This command is only available when plot adjustments are enabled.
4.15 Map Material
This command is used to enable the material mapping mode in which textured materials can be positioned / mapped onto objects.

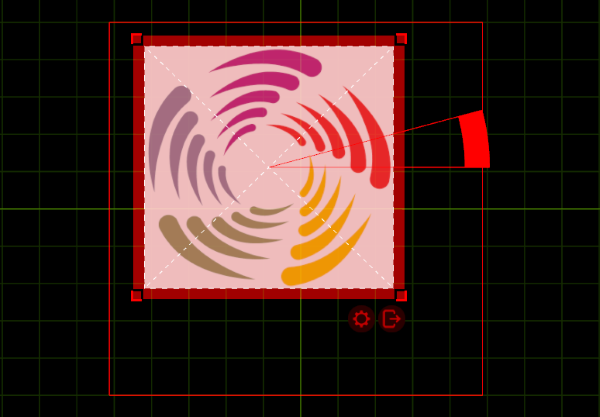
The texture of the material is outlined and crossed with dotted lines. Move and rotate the texture of the material using the selection navigator, as if moving and rotating any other object.
To exit the material mapping mode, use the exit button at the bottom right corner of the selection navigator.
4.15.1 Map to Extents
This command automatically adjusts the material mapping so that it exactly fills the extents of the currently selected objects. If mapping the materials of multiple objects at once this command also aligns the mapping of all materials.
4.15.3 Select Region >
This command selects a previously defined mapping region. See Edit Regions.. on how to define mapping regions.
4.15.5 Edit Regions..
This command opens the Mapping Regions window. In this window it is possible to define mapping subregions. This is useful when the texture of a material is divided into segments to be mapped onto separate objects.
Set the Resolution Width/Height to the resolution of the texture (or media). Use the X/Y Offset and Width/Height properties to define the subregion.
4.16 Model >
4.16.1 Hide Distracting Edges
This commands hides distracting polygon edges, ie polygon edges that lie on flat surfaces, leaving only polygon edges on corners. This reduces the visual clutter of imported objects. It can also have a slight positive effect on wireframe rendering performance.
4.16.2 Convert Lines to Pipes
This commands converts all lines to pipes. This is useful for converting line-based drawings of truss constructions to solid geometry as it could then be seen in Design views in Live mode.
The pipes created are merely hollow cylinders that do not assume any of the specialised functionality that come with actual trusses, such as snapping between trusses or fixture location association.
4.16.3 Edit..
Available when exactly one polygon form is selected, opens the Polygon Editor.
4.17 Sequential >
4.17.1 Sequential Unit


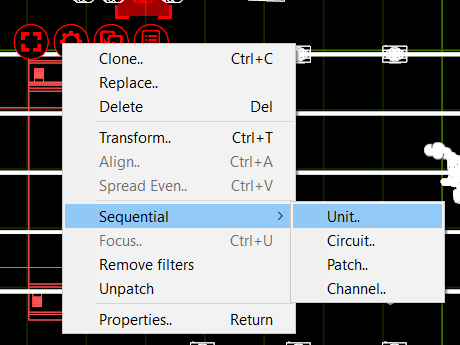
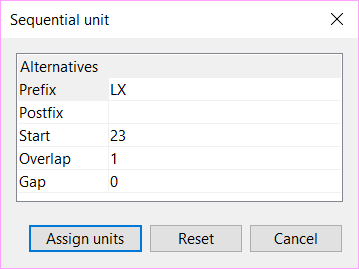
This command allows you to set the Unit property of the selected objects in a consecutive manner. You may specify a Prefix as well as a Postfix to the numbering. The Start property defines the first number of the range. The Overlap property allows you to create series such as 1, 1, 2, 2, 3, 3 and the Gap property allows you to create series such as 1, 3, 5, 7. Notice that if you select objects manually one by one, this defines the order for the numbering. However, if you select them by dragging the mouse over the objects, the order of the objects undefined.
4.17.2 Sequential Circuit
Sequential circuit essentially works just like sequential uniting – except that you assign circuit numbers to the Channel property of fixtures. You may specify a Prefix as well as a Postfix to the numbering.
4.17.3 Sequential Patch
This command allows you to sequentially patch fixtures. The order in which you select the fixtures will be the order they are applied to the patch. You may choose the universe and start address by entering the address as Universe.Address. For example, entering 2.1 would have the fixtures start at channel 1 on universe 2. You also have the option of leaving a gap between fixtures if you wish.
4.18 Focus
This command activates focus mode.
4.21 Measure
This command activates measure mode.
4.22 Select All >
4.22.1 By layer
This commands select all other objects in the same layer(s) as the already selected object(s).
4.22.2 By drawing block name
This command selects all other imported objects with the same drawing block name as the already selected imported object(s).
4.22.3 Motion controlled
This command selects all objects that are motion controlled by the already selected object(s).
4.22.4 Connected truss
This command selects all other trusses connected to the already selected truss(es).
4.25 Properties
This command is a shortcut to the Selected Items category of the Design tab.